Do you get lot of mails every day? If yes, then there is high possibility that you might be getting a lot of attachments. Do you download all of them? No, because you might be really busy to download all. But ever wonder if there is some way that all the attachments are automatically downloaded to your Google Drive account and you can have access to them when you are free.
Yes, there is one way. India’s one of the famous blogger named Amit Aggarwal has made a script and published on his Digital Inspiration blog. We are just spreading his script more and more people. Actually he has made it really easy. Just follow the steps below and all the attachments will go in to your drive automatically.
Tip: Display Presentation slides on blog post with Drive
You need is the access to the script prepared by him so that the above wonder can happen. Click here
STEP #1
Now you need to go to Menu Bar then click on File option. In file option click on “Make a Copy” this will open the same script in another window for you.
STEP #2
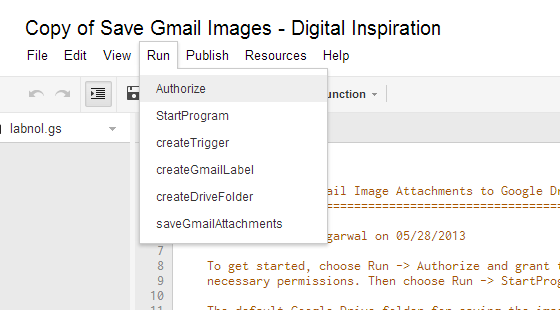
Again in the Menu Bar go to “RUN” and click on “AUTHORISE” then it will ask you to give some permission, go ahead and grant it.
STEP #3
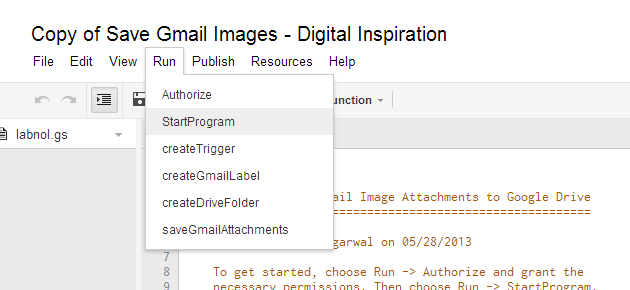
Now again in Menu Bar go to “RUN” option and click on “START PROGRAM” option this will trigger the run script to run in background.
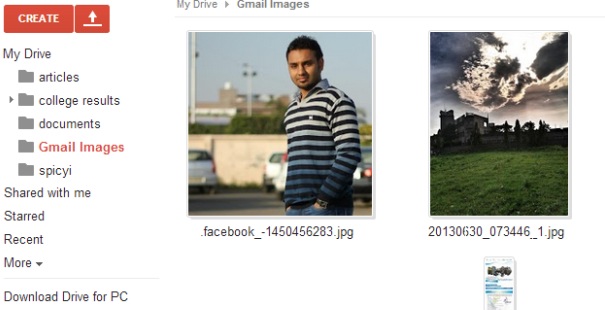
Wait for some time to so that it can collect all the data. After some time you will see a folder named “Google Images” in this folder all your attachments will start to appear as they get downloaded.
If you still want to make some changes then Amit has provided you with Script source code to which you can make changes according to your needs.
Did you find this tutorial useful? Do tell us in comments below. If you are facing any difficulty then you can ask us below for the same.