As I started renovating my kitchen, a range hood is the most important kitchen appliance and I had to move the range to install the hood. I bought the Whirlpool WVW57UC0FS 30″ Stainless Steel Wall Mount Flat Range Hood with 400 CFM motor. Here is the step-by-step installation process.
Step 1: Preparation and Safety
Begin by thoroughly reading the manual as it provides critical details such as the height range (typically 24-36 inches above the cooktop, depending on local codes) and vent hole location. Gather necessary tools and materials, here are what I was using:
- Laser level for precise alignment
- A drill and impact driver
- 6-inch hole saw for the initial vent hole
- Reciprocating saw for cutting vent holes
- KREG Pocket-Hole Jig 320 for drilling holes in support wood
- Horizontal 2×3 wood piece for additional support
- Wago connectors
- Caulk and caulk gun for sealing the vent cap
My ceiling is very low, so I can’t use any straight vent pipes and only use a 90-degree elbow connected to a wall vent. Make sure to use the 26-inch gauge pipes.
Ensure safety by turning off power at the breaker if you’ve already had an electrical wire for the hood. Mark locations of screws and vent hole, use the laser level to ensure it’s perfectly level.
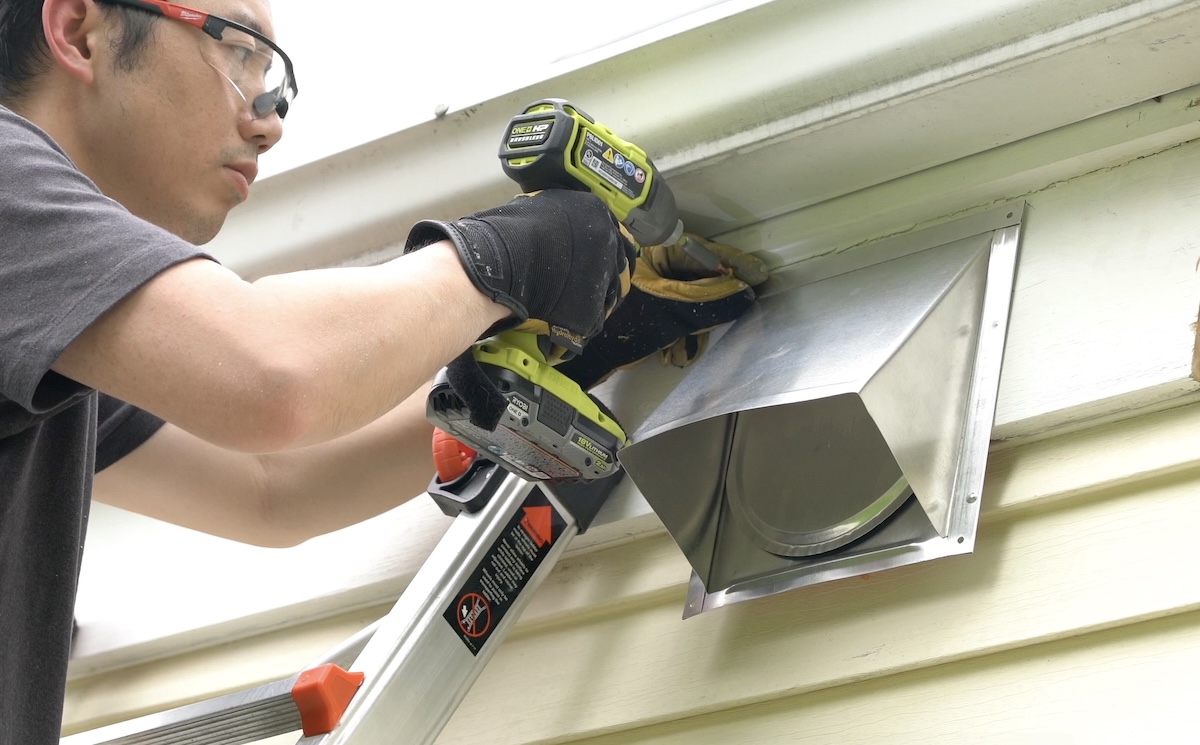
Step 2: Install Vent Cap
Use a 6-inch hole saw to cut the vent hole from the inside first. Then you can go outside and continue your cut. If the vent cap doesn’t fit, carefully enlarge the hole with a reciprocating saw, ensuring the opening is slightly larger.
Attach the vent cap to the exterior wall, ensuring a tight, waterproof seal with caulk. This step is crucial to prevent leaks and maintain efficiency, especially in varying weather conditions.
Step 3: Electrical Preparations
I ran a dedicated 15A wire, which is recommended for safety and compliance with electrical codes. Drill holes next to the vent for wiring, ensuring sufficient length from the breaker box to the hood’s terminal box.
Step 4: Mount the Hood
As the hood is quite heavy and there is no stud around, I had to add a horizontal 2×3 wood piece between the 2 studs to support the hood. Use the KREG Pocket-Hole Jig 320 to drill holes, securing the wood piece firmly with screws. This provides a stable mounting base as we can’t trust the provided drywall anchors.
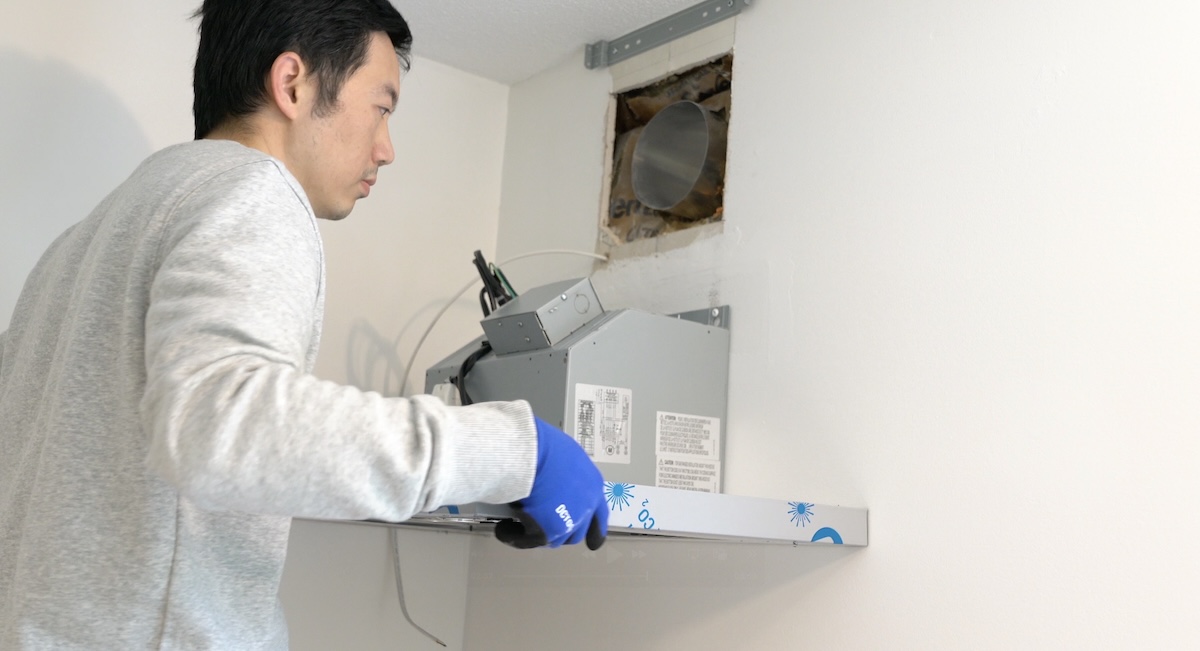
Now you can lift up the hood and secure it to the support wood piece with screws. Tighten upper screws first for stability, then lower ones.
Step 5: Install Ductwork
Use Nashua Tape 324A Premium Foil to seal all joints, wrapping it tightly around connections to prevent air leaks and ensure optimal performance.
Step 6: Connecting Wiring
Connect the hood’s electrical wires to the house wiring, matching colors (black to black, white to white, green or bare copper to ground). For quicker setup, I use WAGO connectors to secure the connections.
Step 7: Final Touches and Testing
Turn the power back on and test the hood’s functionality at different speeds to ensure it operates correctly.
Install vent cover, grease filter, and make sure to remove the foam block next to the fan to avoid efficiency loss or fire hazard. Clean up the area, remove debris and packaging to complete the installation.