After pulling out carpets, I discovered a large area with mold and rot in the subfloor. If you have the same problem, you can replace the damaged area and restore the integrity of your flooring.
Step 1: Assess the Damage
After pulling up the carpet, thoroughly inspect the subfloor for signs of mold or rot. In this case, the subfloor is made of particle board, which is highly susceptible to moisture damage. If the rot or mold is extensive, replacing the affected area is the best solution.
Step 2: Remove the Nails
Once you’ve identified the area needing replacement, begin by removing any nails or screws holding down the damaged particle board. Use a nail puller and a hammer to carefully lift any fasteners.
Step 3: Cut Out the Damaged Area
With the fasteners removed, use a circular saw to cut out the rotted portion. Set the depth of the saw blade to match the thickness of the subfloor so that you avoid cutting into joists or wiring beneath. Be sure to wear protective gear like a dust mask and goggles, as cutting through moldy materials can release harmful spores.
You can also use an oscillating tool to make more precise cuts along the edges of the damaged section, especially where the board meets walls or framing. The oscillating tool’s blade allows for finer control in tight spaces, helping you remove the damaged board cleanly and reducing the risk of damaging adjacent materials. This tool can make the removal process easier and faster compared to using a circular saw alone.
Step 4: Prepare the New Subfloor Material
For durability, replace the particle board with plywood, which is more resistant to moisture. Measure the area you’ve cut out and cut the new plywood piece to size. It’s important that the plywood fits snugly to provide proper support.
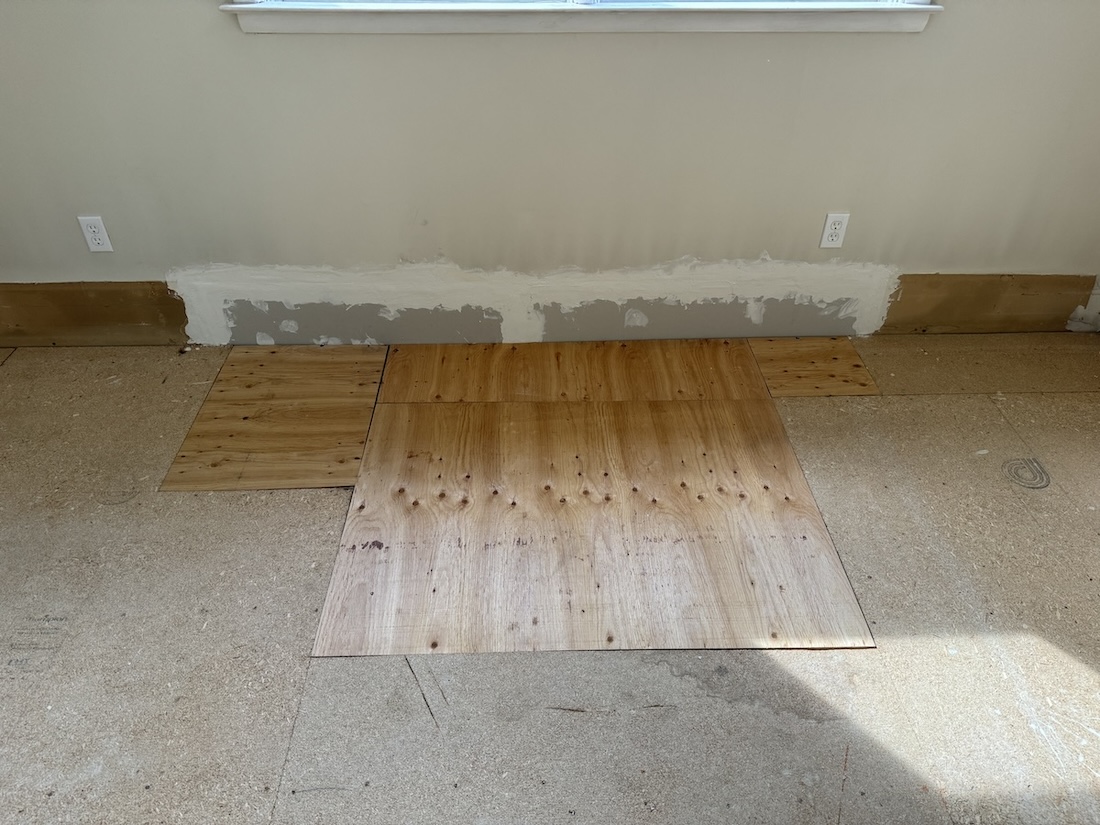
Step 5: Secure the New Subfloor
Once your new plywood is ready, place it into the cutout area and ensure it sits flush with the surrounding subfloor. Use deck screws or nails to fasten the plywood securely to the joists beneath. Space the fasteners every 6-8 inches along the edges and across the middle of the board to ensure a firm and stable installation.
With the subfloor repaired, you can now reinstall your carpet or other flooring materials, ensuring the area is structurally sound and free from further mold risk.