A leaky shut-off valve can be a big trouble as it can lead to water damage and increased utility bills. The good news is that fixing a leaky multi-turn shut-off valve, typically found under bathroom sinks and toilets, is cheap and easy. You can easily repair the valve and stop the leak without replacing the entire valve. Moreover, the whole process takes just a few minutes.
Tools and Materials You’ll Need:
- BrassCraft Multi-Turn Valve Stem Repair Kit
- Adjustable wrench
- Screwdriver
- Plumber’s tape (Teflon tape)
- Bucket or towel
- Old toothbrush or small wire brush (optional)
Step 1: Turn Off the Water Supply
Before starting any plumbing repair, it’s crucial to shut off the water supply to prevent any accidents or further water damage. Locate the main water supply valve and turn it off. This valve is usually found near your water meter or where the water line enters your home. After turning off the main supply, open the faucet connected to the valve you’ll be repairing to drain any remaining water from the lines.
Step 2: Loosen and Remove the Packing Nut
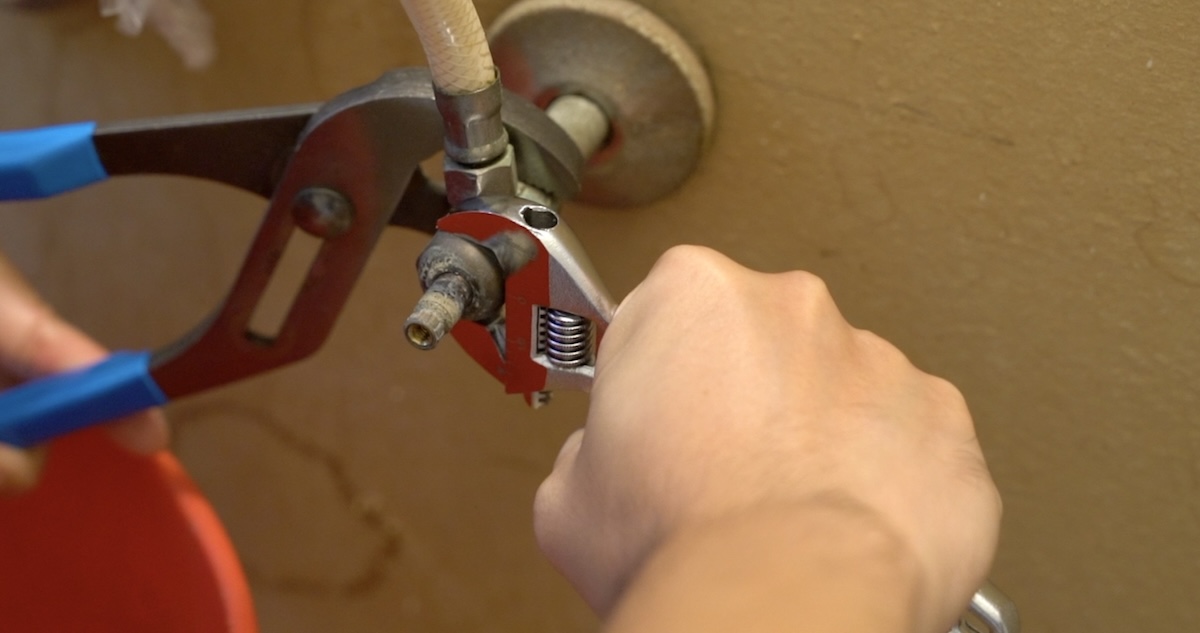
Once the water supply is off, place a bucket or towel under the valve to catch any residual water. Use a screwdriver to remove the handle, then use an adjustable wrench to loosen the packing nut. Turn the nut counterclockwise until it comes off. Then, gently remove the old rubber seal from the nut.
Step 3: Remove the Valve Stem
After removing the packing nut, carefully turn the valve stem counterclockwise and pull it out of the valve body. The stem is the part of the valve that rotates when you turn the handle.
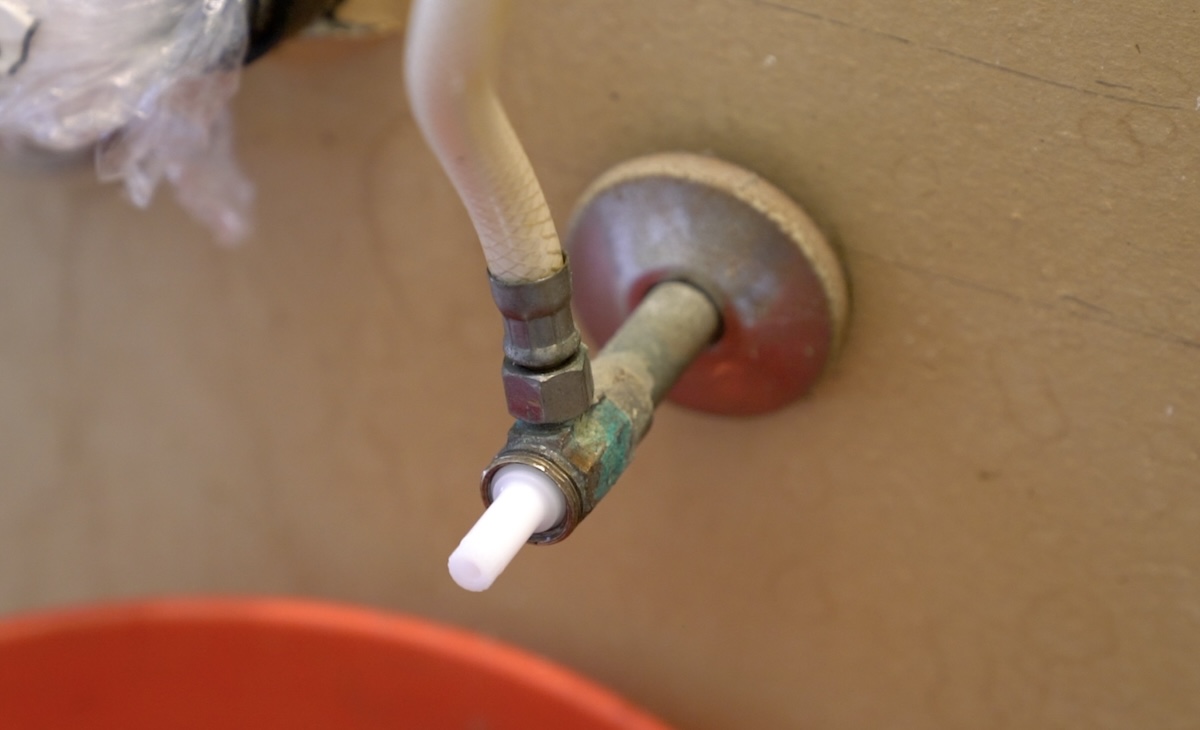
Step 4: Clean the Valve Body
Before installing the new stem, take the time to clean the valve body. Use an old toothbrush or a small wire brush to remove any debris or corrosion from the valve’s interior. This step ensures a proper seal when you install the new stem.
Step 5: Install the New Valve Stem
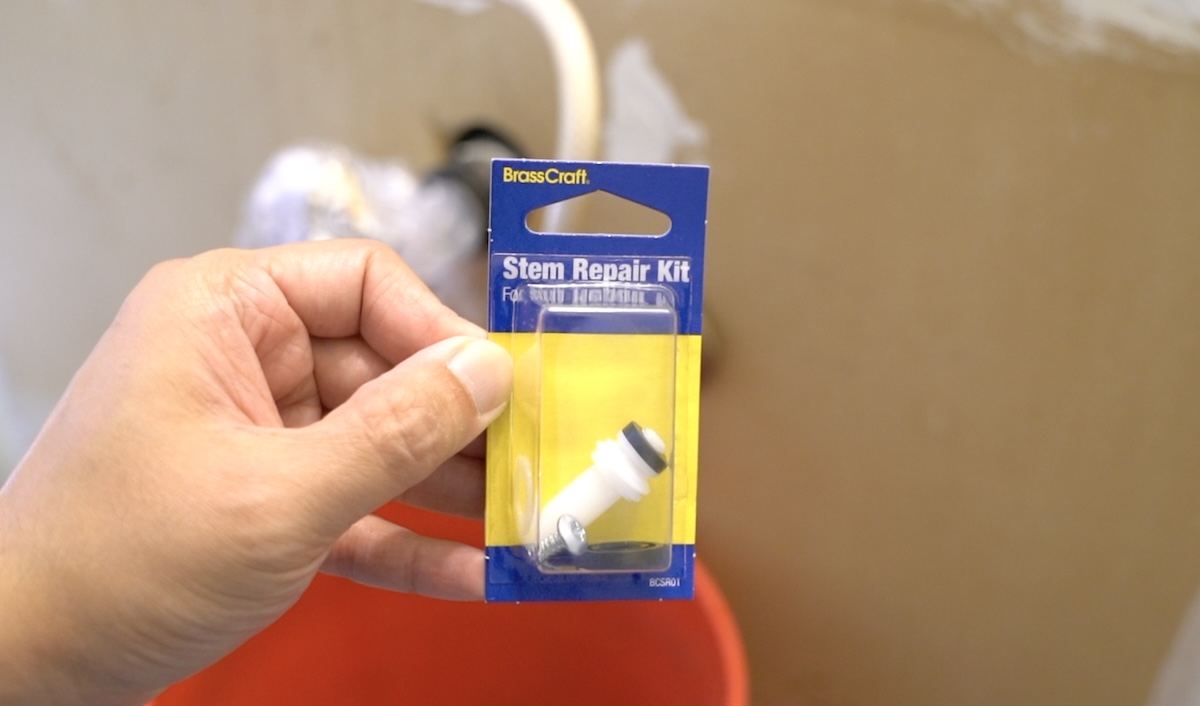
Now, take the new valve stem from the BrassCraft Multi-Turn Valve Stem Repair Kit. Before inserting it into the valve body, wrap the threads of the stem with plumber’s tape. This tape will help create a watertight seal. Insert the new stem into the valve body, ensuring it’s aligned properly.
Step 6: Reattach the Packing Nut
With the new stem in place, screw the packing nut along with the plastic and rubber washers back onto the valve body. Use the adjustable wrench to tighten the nut, but be careful not to overtighten, as this could damage the valve. The packing nut should be snug enough to prevent leaks but still allow the valve to turn smoothly.
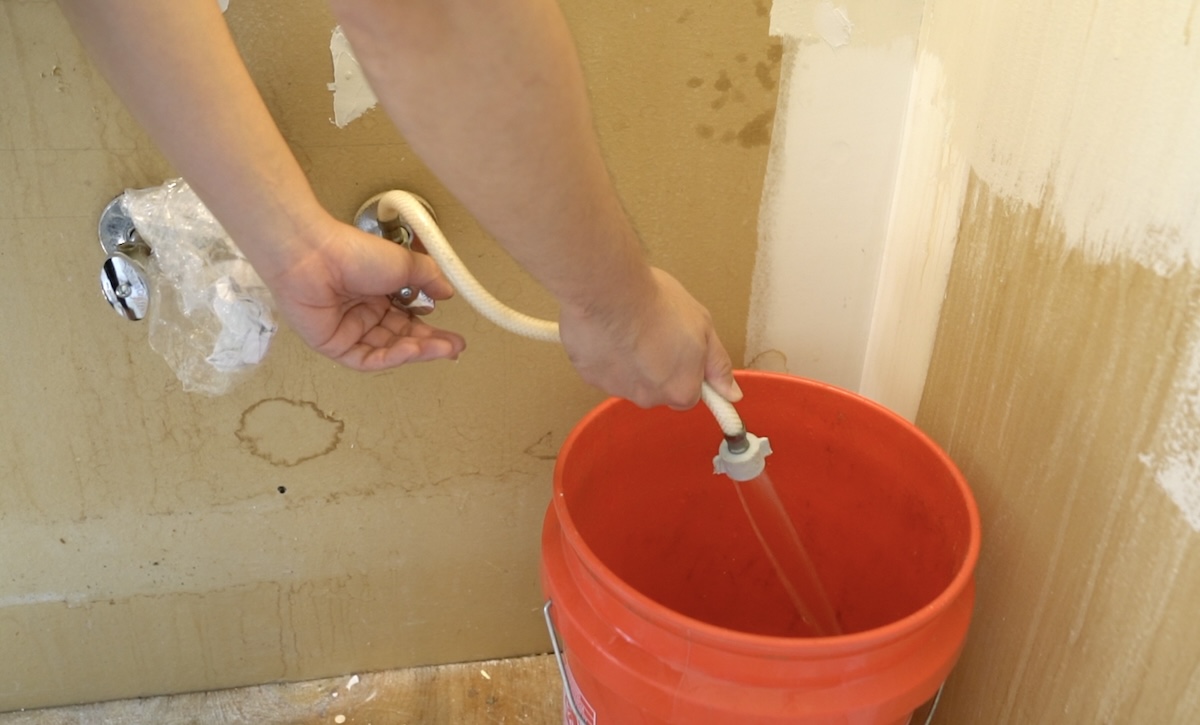
Step 7: Test the Valve
After securing the packing nut, turn the water supply back on by opening the main valve. Slowly open the valve by turning the handle counterclockwise. Check for any leaks around the packing nut or stem. If you notice any leaking, tighten the packing nut slightly until the leak stops. The process will also help flush the supply line.
With the repair complete, monitor the valve for a few days to ensure the leak is fully resolved. If you notice any moisture or water droplets forming around the valve, you may need to tighten the packing nut a bit more or reapply plumber’s tape.
Conclusion
Repairing a leaky multi-turn shut-off valve using the BrassCraft Multi-Turn Valve Stem Repair Kit is a cost-effective and straightforward solution. By following these steps, you can avoid the hassle and expense of replacing the entire valve.