• Skip to primary navigation
  • Skip to main content
  • Skip to footer
  • Home
  • Advertise With Us
  • Contact
  • Cookie Policy
    • Privacy statement (CA)
    • Cookie policy (CA)
    • Privacy statement (UK)
    • Cookie policy (UK)
    • Privacy statement (US)
    • Cookie Policy (US)
    • Privacy statement (EU)
    • Cookie policy (EU)
    • Disclaimer

TechWalls

Technology News | Gadget Reviews | Tutorials

  • Reviews
  • Tech Guide
  • Home Improvement
  • Gadget & Apps
  • News

How to Set Up Amped Wireless REA20 Wi-Fi Range Extender

Updated on Nov 10, 2014 by Tuan Do

Amped Wireless REA20 is among the most powerful Wi-Fi Range Extender you can find on the market. It can extend the Wi-Fi range by up to 10,000 sq ft, which is twice as powerful as the recent Amped Wireless REC15. We will have an insightful review of the device in another post, now let’s find out how to set up the extender.

1. Initial Setup

You should place the extender somewhere between your router and dead zones in your house, make sure it is close enough to get signal from your router. The signal strength is recommended at 70%.

The antennas come with 3 different antennas, you have to attach it to the corresponding positions. Then, plug it to a power outlet.

2. Access Dashboard

Looking at your Wi-Fi connections, you can see there are two new Wi-Fi networks which are named Amped_REA20_2.4 and Amped_REA20_5.0. Just connect to either of them to start the setup.

After the successful connection, go to the Dashboard at http://setup.ampedwireless.com/ or http://192.168.1.240/

amped-wireless-rea20-4

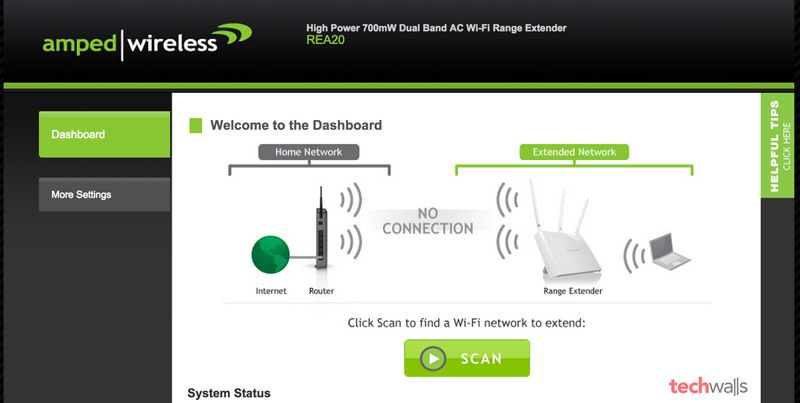
3. Set up Extended Networks

Click on SCAN to find your current Wi-Fi networks.

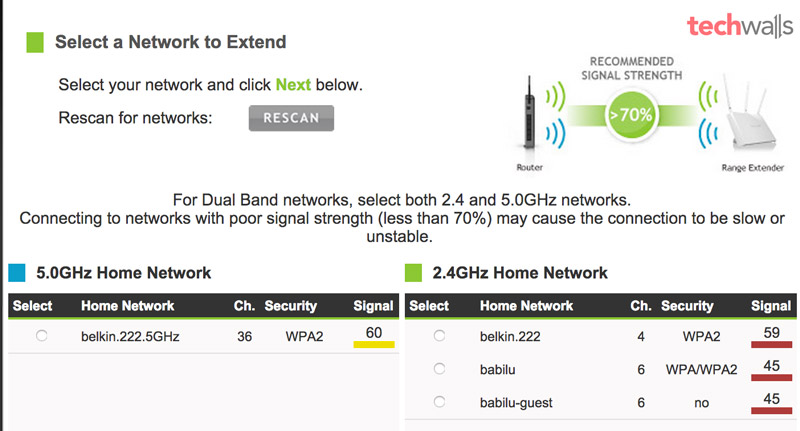
Now you need to choose your networks to extend, just select both 2.4 and 5.0GHz networks.

amped-wireless-rea20-3

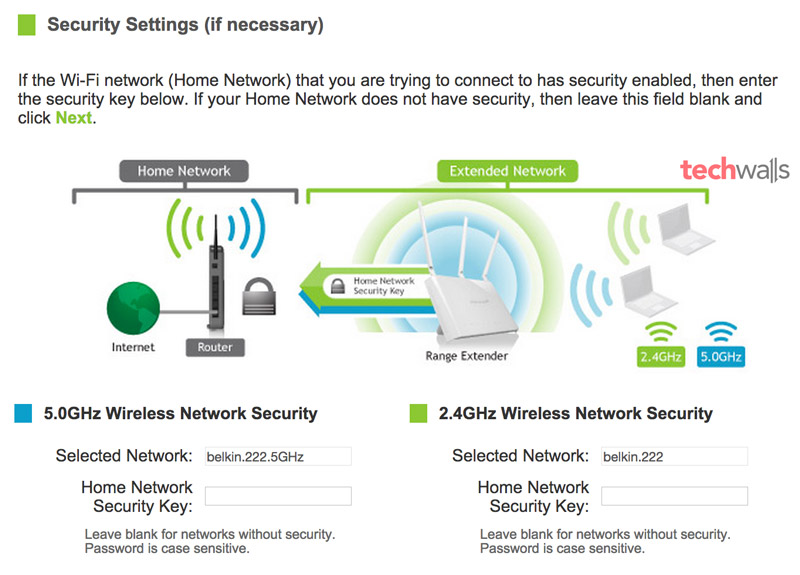
In the next step, you will need to fill in security keys for your existing Wi-Fi networks.

amped-wireless-rea20-1

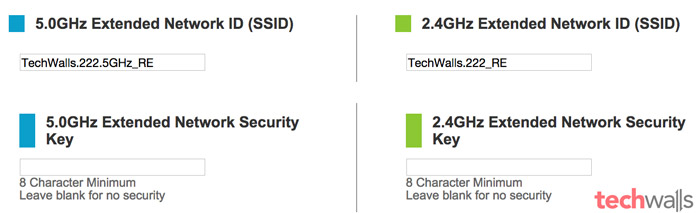
After that, you can set up your new extended networks. You can either copy settings from your home networks or enter a new network ID and security key.

amped-wireless-rea20-2

Then, you will have to wait for 3 minutes for those settings to be applied.

It is almost done, you are disconnected from the previous connection. You can see two new extended networks that were created in the above step. Connect to the 2.4Ghz or 5.0Ghz network, then come back to the Dashboard to confirm.

Now, you are successfully connected to the new extended network. Do you have any issue in the process? Leave a comment below.

Disclosure: We might earn commission from qualifying purchases. The commission help keep the rest of my content free, so thank you!

Reader Interactions

Comments

  1. mike parks says

    Nov 24, 2018 at 11:02 am

    Don’t understand step 2, On what device do I see my wi-fi connections, I have several, desktop, Ipad etc…….I need to connect with a new router, my current setup (router ) has been disconected. thank you

Footer

Makeblock mBot Ranger Review – Learn Scratch Coding with the Robot Kit

Apitor Robot S Review – A Perfect LEGO SPIKE Alternative For Scratch Programming

EPOMAKER CIDOO V65 V2 Wireless Mechanical Keyboard Review

VTOMAN FlashSpeed 1500 Portable Power Station Review

Follow TechWalls

YoutubeFacebookTwitterInstagram

Recent Posts

  • Free Places To Sleep Inside Hong Kong Airport During Long Transits
  • Exploring the WAINLUX K8: A User-Friendly, Fully Enclosed Laser Engraver
  • KOKONI EC2 App-Controlled 3D Printer: Revolutionizing 3D Printing at Home and Beyond
  • Makeblock mBot Ranger Review – Learn Scratch Coding with the Robot Kit

Copyright © 2023 · All Rights Reserved

Manage Cookie Consent
We use technologies like cookies to store and/or access device information. We do this to improve browsing experience and to show personalized ads. Consenting to these technologies will allow us to process data such as browsing behavior or unique IDs on this site. Not consenting or withdrawing consent, may adversely affect certain features and functions.
Functional cookies Always active
The technical storage or access is strictly necessary for the legitimate purpose of enabling the use of a specific service explicitly requested by the subscriber or user, or for the sole purpose of carrying out the transmission of a communication over an electronic communications network.
Preferences
The technical storage or access is necessary for the legitimate purpose of storing preferences that are not requested by the subscriber or user.
Statistics
The technical storage or access that is used exclusively for statistical purposes. The technical storage or access that is used exclusively for anonymous statistical purposes. Without a subpoena, voluntary compliance on the part of your Internet Service Provider, or additional records from a third party, information stored or retrieved for this purpose alone cannot usually be used to identify you.
Marketing
The technical storage or access is required to create user profiles to send advertising, or to track the user on a website or across several websites for similar marketing purposes.
Manage options Manage services Manage {vendor_count} vendors Read more about these purposes
View preferences
{title} {title} {title}