Many holiday decorations use AA batteries for power. It might sound convenient but it can quickly become frustrating when the batteries are dead after only a few days of use. Replacing batteries might take a lot of time and money, even when you use rechargeable batteries. When you have more decorations, you might spend a lot of time replacing and recharging batteries for every single one of them. That’s why I still prefer plugged-in decorations and when I have to buy a battery-powered one, I always try to convert it to plug-in operation.
One simple solution is using the Lenink 1 to 3 AC Power Supply Adapter Kit with On/Off Switch for AA Battery. The main advantage of switching to a plug-in setup is reliability. Once connected to wall power, your decorations can run for hours every day without worrying about draining batteries. This is especially useful during the holiday season when lights and displays are often left on throughout the evening. Over time, the savings from not purchasing replacement batteries also adds up, and you generate less waste.
The process of converting is simple and does not require any permanent modification. The Lenink kit includes dummy battery cells that resemble AA batteries, along with a cable and an AC power adapter equipped with a convenient on/off switch. These dummy cells are designed to provide the same voltage that real batteries would supply.
To begin, open the battery compartment on your decoration and remove any existing batteries. Insert the adapter’s dummy battery cells into the compartment exactly as you would standard AA batteries. Depending on your decoration, you may need a configuration that replaces one, two, or three batteries. The 1 to 3 adapter kit is useful because it can support multiple arrangements. If your decoration uses AAA batteries instead, similar adapter versions are available that follow the same installation process.
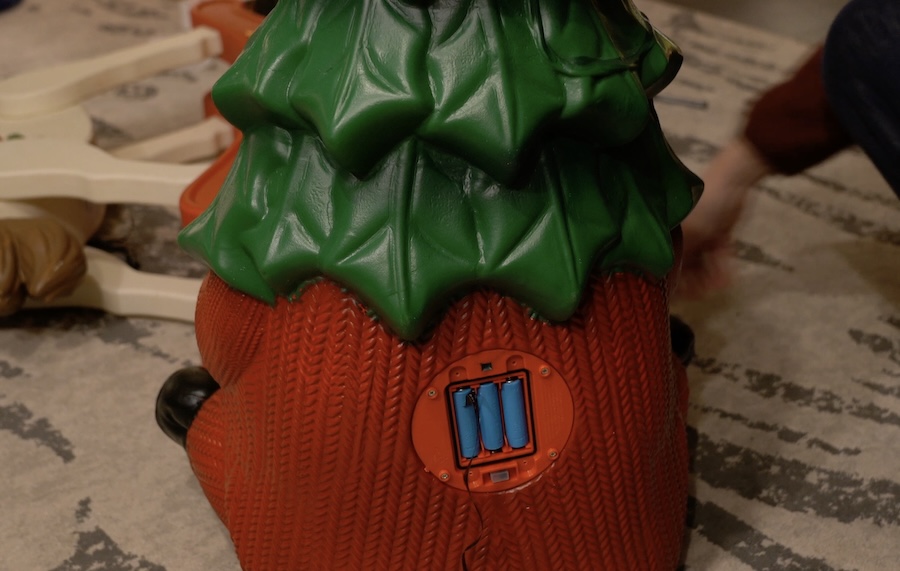
Once the adapter cells are in place, route the attached cable out; The cable is thin and flat so that it exits the battery compartment easily. Connect the cable to the AC power unit and plug it into a nearby wall outlet.
With everything connected, use the built-in switch on the adapter to power on the decoration. In most cases, the lights or motorized features will start immediately, just as they would with fresh batteries. These adapters are intended for indoor use, so they should not be exposed to moisture.
With only a few minutes of setup, I’ve turned all my blow molds to plugged-in ones and can keep my holiday displays running consistently throughout the season without the hassle of replacing batteries every week.