Eclipse Juno is very useful and friendly interface for java programmers. We will use Eclipse with Android or java web applications or Java.
Those who want to install Eclipse Juno and they want to configure jdk as run time environment for Eclipse Juno. First they have following software:
- Eclipse Juno
- JDK
You can also download these software’s from the given link as below:
When your downloading is complete. You have to follow some steps for installation of Eclipse Juno and Configure jdk as run time environment:
Step 1:
- You can also download Eclipse Juno, click on your version of window for example 32 bit or 64 bit. Then you have to extract the zip file of Eclipse Juno to your hard disk.
- Click on eclipse.exe file to run eclipse on your system.
- Then new window ask you for workspace. User can also change the name and location of the folder. Then eclipse will start and ready to use.
Step 2:
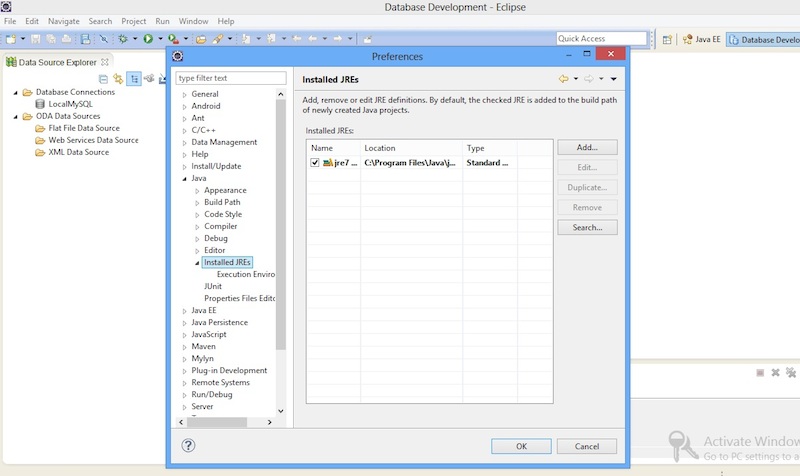
- In eclipse menu bar click on windows -> Preferences.
- In the left panel of Preferences window click on java-> Installed JRE.
- New window is open. That window is your Preferences Window click on add button to add the jdk1.7 to configure jdk as run time Environment.
- When you click on add button then new window is open. There are three options that are Execution Environment Description, Standard 1.1.x VM, Standard VM. You have to select standard VM out of them. Then click on Next button.
- Then new window is open that is your Add JRE window. Click on Directory to browse your jdk directory and click ok.
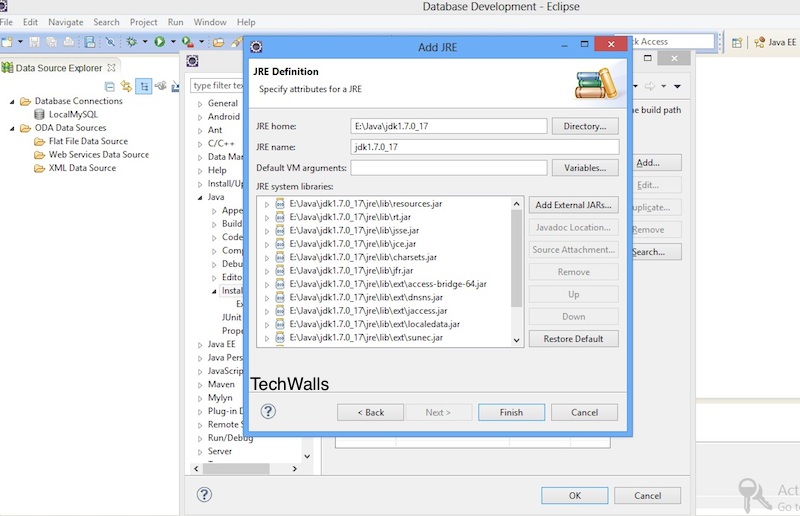
- In JRE system Libraries it will show you all the java libraries. After that you have to click finish button.
- Again you are moved in Preferences window. Then by default it select jre file. You have to change that and select jdk file that is the first option.
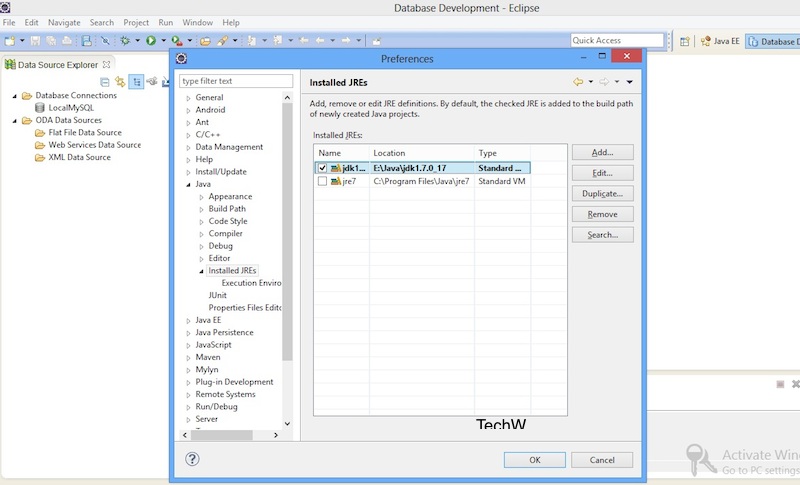
- Click OK.
Now you are successfully configured jdk as run time environment in Eclipse Juno.
Hopefully this information is useful to you.
Thank you


Samir says
Hello,
Very useful article, Never installed eclipse so don’t know how to do it. But your article is really useful and detailed too.
thanks
Nancy says
Thank you Samir