A broken toilet flange ring can cause your toilet to wobble, leak, or even disconnect completely. Fortunately, the Oatey Replacement Ring offers a straightforward solution that restores your toilet’s stability without needing to replace the entire flange. Here’s how I repaired the broken flange ring.
What You’ll Need:
- Oatey 7 in. Galvanized Steel Toilet Flange Replacement Ring (Oatey Moss Bay 6.95-in Silver)
- Screwdriver or drill
- Stainless steel crews
- Flathead screwdriver or pry bar
- Wax ring
How To Replace The Ring
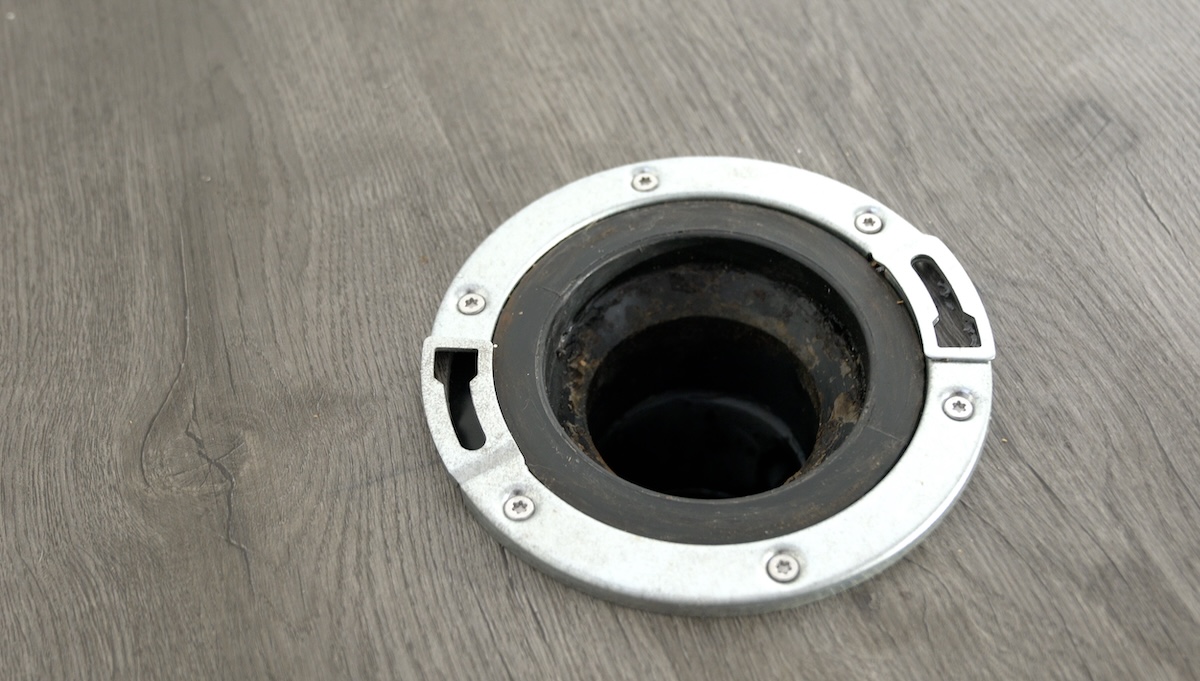
Assess the condition of the flange. If only the outer ring is broken, the Oatey replacement ring is perfect for the job. Loosen and remove any screws holding the broken ring in place using a screwdriver or drill. Carefully lift and remove the damaged flange ring using a flathead screwdriver or pry bar. Be cautious to avoid damaging the subfloor or the pipe.
Position the Oatey 7 in. Galvanized Steel Toilet Flange Replacement Ring on the existing flange, ensuring it sits flush with the floor. Measure and align the bolt slots so that you can mount the toilet straight later. Use screws to attach the replacement ring to the subfloor. If the subfloor is concrete, use appropriate concrete anchors for a secure fit. Tighten the screws evenly to ensure the ring is firmly in place.
Place a new wax ring on the flange or the bottom of the toilet. Carefully lower the toilet onto the flange, ensuring the bolts pass through the mounting holes on the toilet base. Press down gently to compress the wax ring and create a seal. Tighten the nuts onto the mounting bolts evenly to prevent cracking the toilet base, being careful not to overtighten. Reattach the water supply line and turn the water back on. Test for leaks by flushing the toilet several times.
If you’re tackling this repair for the first time, follow these steps carefully, and you’ll have your toilet back in working order in no time.