People are now dependent on their phones more than ever. From looking up the meanings of words to searching for directions, everything is done on mobile phones. App developers are now taking advantage of this and are developing new, unique apps; but the success of these apps is completely dependent on the user experience (UX).
The key factor in the success of an app is a good user experience (UX). It is what separates successful apps from unsuccessful ones. Simply put, a good UX should be user-friendly. But how do you ensure that?
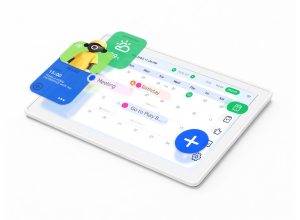
How To Make Your Application User-Friendly

Here are some things that you should keep in mind while designing an app to ensure that it is user-friendly:
1) Provide Simple Navigation
A good UX must allow users to navigate between different tabs by going back and forth between screens and find their desired item. If the process is too complex, it is likely that the user will not want to proceed.
2) Minimize Cognitive Load
The human mind can absorb only a limited amount of information at a given time. As a developer, you must remember this and ensure that the app does not overload the user with heavy information all at once.
3) Go For A Minimalist Design
It is not necessary to display every piece of information on the homepage. Try to keep your design simple and easy to understand by displaying minimum content on every page, by making dividing the info into categories and making tabs for every category.
4) Don’t Clutter UI Elements
Aside from information overload, cluttering user interface (UI) elements is the worst thing that you can possibly do to your app. Every added image, button, and icon is likely to put off the user; thus, you should keep these elements to a minimum.
5) Display Large Text
Small fonts can be difficult to read for many users, which is why you should highlight important information by increasing the font size. But keep in mind that mobile phone screens are small, so you will not be able to display all of your desired information if you increase the font size too much.
6) Minimize User Efforts
Design your app in such a way that the user has to put in minimum effort. For example, most apps require users to create an account. In such cases, the sign-up form should ask for the necessary details only and should provide the user an option to log in with their social media accounts.
7) Give Feedback
The app should keep users informed about any changes or updates in the state or condition of the app, and errors that are relevant to the user through clear, concise messages that are fairly easy to understand.
What to Build and How To Build
Once you fully understand how to build a user-friendly application, the next step is to think about what you want to build and how you are going to build it.
Let’s say you want to build an app that will teach people how to play the guitar. You are planning to offer different types of lessons for beginners, intermediates, and experts. The user will also have an option to sign up as a student or as a teacher.
The first thing you need to do is brainstorm what functions the application should have. Ideally, the app would have the following functions:
1) Notifications – you will need to inform the user about new lessons and send reminders in case they haven’t opened the app in a few days, so you’ll need an onboarding screen that asks for the user’s permission to send push notifications.
2) Home Screen – you will need a screen where the user can choose if they want to sign up as a student or as a teacher and their level (beginner, intermediate or expert), view their progress and also access the settings.
3) Payment Option – once the user has filled out the sign-up form, the next step is to pay for the lessons. You will need to incorporate the option of paying through different mediums (credit cards, PayPal, etc).
4) Tracking and Viewing Progress – the user should be able to track and view their progress in different lessons that they have taken.
These are just some of the functions of a simple application. They can vary, depending on the complexity of the application.
After brainstorming the main functions of the app, you will have to roughly sketch out the various functions using a pen and paper. Once these are finalized, you can move on to Sketch and turn your vision into reality. The first step is to create a simple flowchart to understand how the user will navigate through the app. Afterward, you can start sketching out individual screens.
Again, the process of building your app will vary depending upon the complexity. In our example of the guitar learning app, you will have to first create the design of the push notifications, then the home screen and so on.
Testing Your App
The last thing you need to do before you launch your app for the public is to test it. After all, you don’t want your months (or even years) of hard work to go to waste.
The best way to test your Android app on your PC is to use BlueStacks.
BlueStacks is one of the most efficient Android emulators. It allows developers to test their Android apps or also play Android games on their PC with operating systems like Windows 8, 9, 10 and Mac OS.
Here’s how you can install BlueStacks on your PC and use it to test your app:
Step 1: Open your browser and download BlueStacks Offline Player through the official website of Bluestacks. Make sure you have a good internet connection.
Step 2: Once the step up is downloaded, click on it to begin the installation process. If your PC asks for permission, click on “Run” or “Yes”.
Step 3: A welcome window will appear. Click on “Next” to proceed and the installation will begin.
Step 4: Once the installation process is complete, a window will appear. Click on “Finish” and the program will run.
Step 5: Click in the Google Play store icon and sign in to your existing Google account or create a new one. Just like an Android device, you can use the Google Play Store.
After this, you will have the option of running your app or downloading apps available on the Play Store. With BlueStacks, you can easily identify the glitches in your app and fix them before you launch it!